Llamar a una macro
Vamos a escribir nuestra segunda macro:
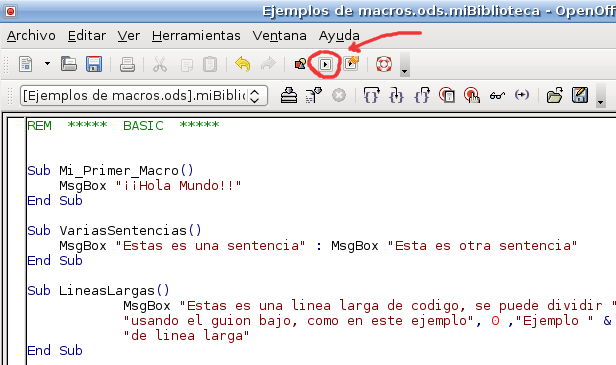
Sub Mi_Segunda_Macro()
'Algo más interesante
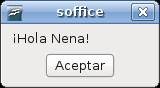
MsgBox "¡Hola Nena!"
End Sub
Y agregamos una tercera.
Sub MiTercerMacro()
'Lo que quieras
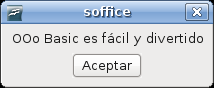
MsgBox "OOo Basic es fácil y divertido"
End Sub
En el nombre de la tercera no se han usado guiones para separar las palabras. Esta técnica se denominada nomenclatura de camello, y consiste en escribir las palabras en minúscula con la primera letra en mayúscula, sin espacios ni separadores de ningún tipo. De ahora en adelante, utilizaremos esta nomenclatura .
Si intentamos ejecutar cada una de las macros (por ejemplo, haciendo clic sobre la macro y pulsando {{#switch:f5 | shift = ⇧ Shift | up = ↑ | down = ↓ | > = → | < = ← | enter = ↵ Enter | cmd = ⌘ Cmd | command = ⌘ Cmd | opt = ⌥ Opt | option = ⌥ Opt | tab = Tab ⇆ | backspace = ← Backspace | << = ← Backspace | bs = ← Backspace | * = * | # = # | ; = ; | : = : | #default = F5 }} {{#if:| + {{#switch:{{{2}}} | shift = ⇧ Shift | up = ↑ | down = ↓ | > = → | < = ← | enter = ↵ Enter | cmd = ⌘ Cmd | command = ⌘ Cmd | opt = ⌥ Opt | option = ⌥ Opt | tab = Tab ⇆ | backspace = ← Backspace | << = ← Backspace | bs = ← Backspace | * = * | # = # | ; = ; | : = : | #default = {{{2}}} }} }}{{#if:| + {{#switch:{{{3}}} | shift = ⇧ Shift | up = ↑ | down = ↓ | > = → | < = ← | enter = ↵ Enter | cmd = ⌘ Cmd | command = ⌘ Cmd | opt = ⌥ Opt | option = ⌥ Opt | tab = Tab ⇆ | backspace = ← Backspace | << = ← Backspace | bs = ← Backspace | * = * | # = # | ; = ; | : = : | #default = {{{3}}} }} }}{{#if:| + {{#switch:{{{4}}} | shift = ⇧ Shift | up = ↑ | down = ↓ | > = → | < = ← | enter = ↵ Enter | cmd = ⌘ Cmd | command = ⌘ Cmd | opt = ⌥ Opt | option = ⌥ Opt | tab = Tab ⇆ | backspace = ← Backspace | << = ← Backspace | bs = ← Backspace | * = * | # = # | ; = ; | : = : | #default = {{{4}}} }} }}{{#if:| + {{#switch:{{{5}}} | shift = ⇧ Shift | up = ↑ | down = ↓ | > = → | < = ← | enter = ↵ Enter | cmd = ⌘ Cmd | command = ⌘ Cmd | opt = ⌥ Opt | option = ⌥ Opt | tab = Tab ⇆ | backspace = ← Backspace | << = ← Backspace | bs = ← Backspace | * = * | # = # | ; = ; | : = : | #default = {{{5}}} }} }}{{#if:| + {{#switch:{{{6}}} | shift = ⇧ Shift | up = ↑ | down = ↓ | > = → | < = ← | enter = ↵ Enter | cmd = ⌘ Cmd | command = ⌘ Cmd | opt = ⌥ Opt | option = ⌥ Opt | tab = Tab ⇆ | backspace = ← Backspace | << = ← Backspace | bs = ← Backspace | * = * | # = # | ; = ; | : = : | #default = {{{6}}} }} }} ) veremos que el IDE tan sólo ejecuta la primera macro del módulo activo.
Por contra, y como excepción, en algunas distribuciones Linux la macro que se ejecuta al presionar {{#switch:f5 | shift = ⇧ Shift | up = ↑ | down = ↓ | > = → | < = ← | enter = ↵ Enter | cmd = ⌘ Cmd | command = ⌘ Cmd | opt = ⌥ Opt | option = ⌥ Opt | tab = Tab ⇆ | backspace = ← Backspace | << = ← Backspace | bs = ← Backspace | * = * | # = # | ; = ; | : = : | #default = F5 }} {{#if:| + {{#switch:{{{2}}} | shift = ⇧ Shift | up = ↑ | down = ↓ | > = → | < = ← | enter = ↵ Enter | cmd = ⌘ Cmd | command = ⌘ Cmd | opt = ⌥ Opt | option = ⌥ Opt | tab = Tab ⇆ | backspace = ← Backspace | << = ← Backspace | bs = ← Backspace | * = * | # = # | ; = ; | : = : | #default = {{{2}}} }} }}{{#if:| + {{#switch:{{{3}}} | shift = ⇧ Shift | up = ↑ | down = ↓ | > = → | < = ← | enter = ↵ Enter | cmd = ⌘ Cmd | command = ⌘ Cmd | opt = ⌥ Opt | option = ⌥ Opt | tab = Tab ⇆ | backspace = ← Backspace | << = ← Backspace | bs = ← Backspace | * = * | # = # | ; = ; | : = : | #default = {{{3}}} }} }}{{#if:| + {{#switch:{{{4}}} | shift = ⇧ Shift | up = ↑ | down = ↓ | > = → | < = ← | enter = ↵ Enter | cmd = ⌘ Cmd | command = ⌘ Cmd | opt = ⌥ Opt | option = ⌥ Opt | tab = Tab ⇆ | backspace = ← Backspace | << = ← Backspace | bs = ← Backspace | * = * | # = # | ; = ; | : = : | #default = {{{4}}} }} }}{{#if:| + {{#switch:{{{5}}} | shift = ⇧ Shift | up = ↑ | down = ↓ | > = → | < = ← | enter = ↵ Enter | cmd = ⌘ Cmd | command = ⌘ Cmd | opt = ⌥ Opt | option = ⌥ Opt | tab = Tab ⇆ | backspace = ← Backspace | << = ← Backspace | bs = ← Backspace | * = * | # = # | ; = ; | : = : | #default = {{{5}}} }} }}{{#if:| + {{#switch:{{{6}}} | shift = ⇧ Shift | up = ↑ | down = ↓ | > = → | < = ← | enter = ↵ Enter | cmd = ⌘ Cmd | command = ⌘ Cmd | opt = ⌥ Opt | option = ⌥ Opt | tab = Tab ⇆ | backspace = ← Backspace | << = ← Backspace | bs = ← Backspace | * = * | # = # | ; = ; | : = : | #default = {{{6}}} }} }} es la macro donde está situado el cursor de escritura en ese momento; no se puede aplicar como regla general, ya que todavía no se ha implementado en la distribución oficial.
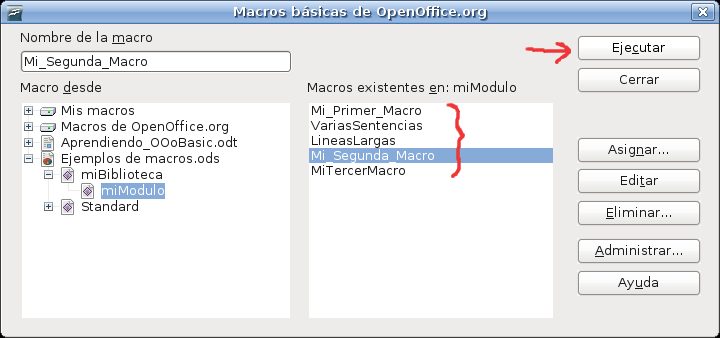
Para seleccionar y ejecutar una macro cualquiera, desde la barra de herramientas haz clic sobre el botón ![]() Seleccionar macro.
Seleccionar macro.
Del cuadro de dialogo mostrado, selecciona la macro deseada y presiona el botón Ejecutar.
El resultado sería el siguiente
Repetimos el proceso para la tercera, obteniendo este resultado:
Disponemos de otra técnica para ejecutar una o varias macros: consiste en crear una macro que escribimos al principio del módulo y desde ésta, llamar a las otras macros. Por ejemplo:
 REM ***** BASIC *****

 Sub Pruebas
     Mi_Primer_Macro
 End Sub

 Sub Mi_Primer_Macro
     'Todo un clásico
     MsgBox "¡Hola Mundo!"
 End Sub

 Sub Mi_Segunda_Macro
     'Algo mas interesante
     MsgBox "¡Hola Nena!"
 End Sub

 Sub MiTercerMacro
     'Lo que quieras
     MsgBox "OOo Basic es fácil y divertido"
 End Sub
Llamar a una macro desde otra es tan sencillo como escribir el nombre correcto de la macro a la que deseamos llamar...
Como dijimos, puedes llamar a una o más macros:
 Sub Pruebas
     Mi_Primer_Macro
     Mi_Segunda_Macro
 End Sub
Otra técnica para llamar a otras macros consiste en utilizar la instrucción Call; el resultado es el mismo:
 Sub Pruebas
     Call Mi_Primer_Macro
     Call Mi_Segunda_Macro
 End Sub
Éste ultimo método es preferible al primero, si bien, veremos el porqué más adelante
|
| |||||||||||
| Si tienes dudas acerca de lo aquí explicado, tienes algún problema con AOO, o quieres ampliar la información, no dudes en dirigirte al {{#switch: macros |
indice = Índice del Foro Oficial en español de Apache OpenOffice | writer = Foro Oficial en español de Apache OpenOffice para Writer | calc = Foro Oficial en español de Apache OpenOffice para Calc | impress = Foro Oficial en español de Apache OpenOffice para Impress | draw = Foro Oficial en español de Apache OpenOffice para Draw | base = Foro Oficial en español de Apache OpenOffice para Base | math = Foro Oficial en español de Apache OpenOffice para Math | macros = Foro Oficial en español de Apache OpenOffice para Macros y API UNO | extensiones = Foro Oficial en español de Apache OpenOffice para Extensiones | comunidad = Foro Oficial en español de Apache OpenOffice para la Comunidad | macros
}} |